
Disclaimer that my anxiety is making me reinforce: I’m completely self-taught, not an expert and I don’t think my designs/graphics are so good that I have to bestow my wisdom on the world I honestly don’t know what I’m doing half the time bUT I feel like I could maybe(????) help point people in the right direction ??? also I think it’s important to note that for the majority of my designs I use Photoshop. I could potentially be overlooking some parts of Canva because I’m not 100% familiar with it.
** this post focuses on the free version of canva **
contents
click on a link to be taken to a specific section!!

01: quick image format crash course:
- JPG: your standard image form
- PNG: high quality images that allow transparency – this is mostly used for logos and icons
- GIF: allows transparency but not as high quality as PNGs, animated images aka memes.
You should ALWAYS save large photographs as jpgs. Logos and designs with transparency should be PNGs not GIFs. Even though GIFs reserve transparency too, PNGs are better suited for graphics. However, for some reason Canva seems to drastically lower the quality of JPGs so you might want to save your designs on there as PNGs.
First of all, you’re gonna need elements to add to your design. This could be photos, text, backgrounds etc. If you have your own photos/drawings then you can use these. If you’re like me and have neither then, fortunately, there’s a whole hoard of free resources out there that you can (legally) use for your blog.
some basic tips:
- always check licences and usage rights. some sites won’t require you to give credit (unsplash), but others will (freepik)
- try and have a rough plan of your design so you know what to search for
- try and find images with “white space” this will make it easier to place text
- when finding resources search for keywords like “backgrounds“, “textures” and “flat lay“
- it’s important to choose large images because you can decrease the size but if you try to scale up a small image it’s gonna look all pixelated and not nice
There’s honestly so many places to get design resources from. Just having a quick google search of “free design resources” will bring up a lot of results. I tend to stay away from Google Images (unless I need it as a last resort), but if you want to use that then I suggest using the search filters to search for large images and use the licensing filter to find images that are allowed to be reused.
some of my fave places to get design resources from:
** these sites may require you to create a free account **
- Generate a random colour scheme
- Generate a colour palette from an image
- Freepik – vectors, photos and PSDs
- ** Fonts: BeFonts, DaFont, Behance, Font Fabric, Free Typography **
- icons8 – icons, logos, social media buttons ect.
- Pixabay – stock photos
- pngtree – png graphics
- stickpng – png graphics
- textures.com – textures, stock photos
- Unpslash – stock photos
** the free version of canva doesn’t allow you to use custom fonts, but I thought I’d share some sites anyway in case people use different photo editing apps **
Canva has its own library of design resources and templates but not all of them are free. If you click on the buttons on the side you can browse through some of them to see if there’s anything that you like.

Freepik has a lot of amazing resources especially backgrounds but the catch is that most of their files are in AI format which is what Adobe Illustrator uses and they can’t be uploaded to Canva. It’s a shame because vectors (images that can be resized and not lose resolution) are super useful and being able to upload them to Canva would be really helpful. If you want to avoid getting vectors in your Freepik search then choose “photos” from the filters menu. If you want to take a little extra time and find specific designs then there are ways to use the vectors because within the .zip folder you’re given there’s a JPG image.
example:


This is achieved on Canva by clicking on elements and then searching for a plain blank shape. You change the shape colour to match the background and then drag it over the text, creating a “blank space” to write your own text.
To upload your own design elements click on “uploads” and then “upload an image” and locate the items that you want to use.
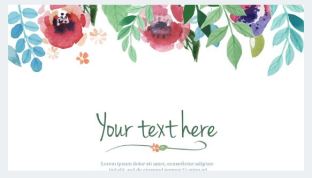
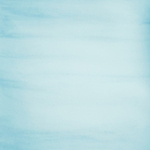
03: backgrounds to get you started
click on the image for the full sized version
gradient backgrounds from me:

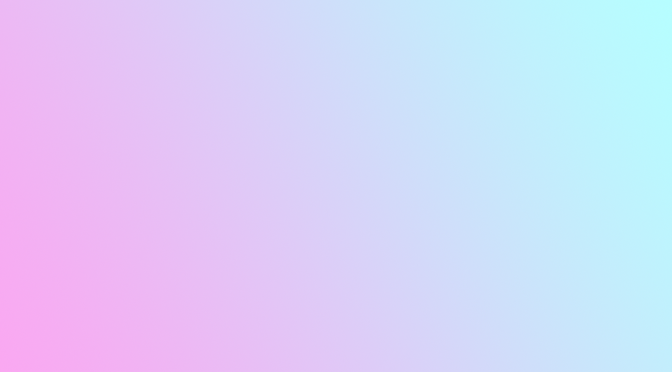


a link back would be nice if you use these but it’s not required
from canva & pixabay:


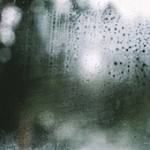


from freepik:


04: putting everything together
Okay now that you’ve gathered the different elements that you want for your blog graphic whether it be a header or featured image you can work on combining it.
Obviously, this part comes down to personal preference. Design is subjective and everyone’s always gonna have a different opinion. I like keeping my designs simple and prefer using flat colours or gradients as backgrounds over photos so that’s what I’ll be focusing on here.
some basic tips:
- make sure your colours don’t clash
- use a font that’s readable
- if you have a busy image as your background then give your text a solid colour background so it stands out
- keep your designs balanced
Back on the Canva website click on the “create a design” button and then “custom dimensions“. If you’re making a header image for your blog then you’ll need to refer to your theme to see the recommended sizes. When it comes to featured images then ….. I don’t know ??? I feel like I’ve looked everywhere to find a required size but I keep seeing different things and no matter what I do nothing seems to fit responsively. I gave up trying to find something concrete and I make all my featured images 672 x 372 px. That’s what I’ll be working with for this example. I saw this size on one of my many google searches and at the time it seemed to work the best. Every time the reader gets updated though things break so if anyone knows exact sizes for things to be responsive please help a girl out and let me know ????

05: how to edit elements on canva
filters and adjustments
Once you’ve added a photo or background you can click on it and it’ll give you the option to resize/crop it. Resize by dragging the corner handles and crop by dragging the side/top/bottom handles. You’ll also see this menu:
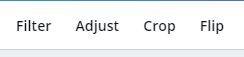

“filter” brings up pre-existing filters like you use on Instagram etc.

“adjust” brings up these options:

image settings explained by a girl who has had no formal training and who just adjusts settings randomly and hopes for the best:
- brightness/contrast – controls how light/dark the image is
- saturation – controls how vibrant the colours are so if you put it on -100 it’s going to make the image black and white
- tint – changes the warm/cool tones of the image
- blur – makes the image blurry or if you put the indicator on a number that’s between 0 to -100 it’ll sharpen it
- x-process – gives the image a “film like” filter
- vignette – puts a blurry black border around the image
aligning, positioning and transparency:


You might have noticed lines appearing when you’ve moved elements around on Canva. These are “guide lines” and used to help you align and position things evenly. The lines on the first image mean that an element is horizontally and vertically centred. You can also use the grid lines to line up items and center items within other items and probably a lot of other things that I’m not familiar with.

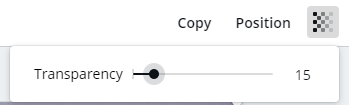
clicking on position allows you to send elements to the front or back of other elements. You can also align elements to different areas of the canvas
clicking on the little grid icon controls the transparency of elements so dragging it up and down increases how visible they are
examples:
You can create shadows by creating a “copy” of the text/image, lowering the transparency and sending it behind the original image. You can also use the “filter” options to add a blur.

You can layer multiple background images to create different effects using the position and transparency settings


06: adding text
Choosing text is something I struggle with a lot so I’m going to link some pre-existing articles that explain it a lot better than I could. My only suggestion is to make sure your text colour doesn’t blend in with whatever your background is. That’s when using drop shadows or adding backgrounds can come in handy.


You can add text to your design on Canva by clicking on “text” on the sidebar from there you can choose pre-made templates or write your own. Once you’ve placed text you’ll get this menu bar:

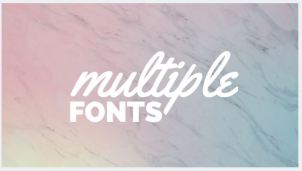
- the dropdown menu is the list of fonts that canva has, selecting one will change the font of your text — you can use multiple fonts by creating separate text layers
- “A” with the colour bar allows you to change the colour of your font
- “B” and “I” makes your text bold or italic if the option is available
- the “horizontal bars” align your text so you can have it be centered, to the left or to the right
- “aA” makes your text lowercase or uppercase
- the bullet point icon makes your text into a bullet point list
- spacing is where you can change the space between the letters of your text or the space between each line
examples:


07: here’s some i prepared earlier…
These designs are some I made really quickly using nothing but Canva and the websites I linked above:


Obviously, everything above can also be combined to make a blog header or other graphics too, you just need to change the dimensions.
examples:

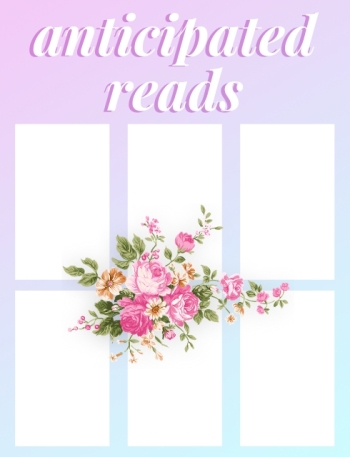
(can y’all tell I like using pastel pink in my designs lmao)
If for some reason you want to use these then you’re totally welcome to! Whether you want to try and make your own versions, use them as “inspiration” or just use them as they are. Once again, a link back to this post/my blog would be appreciated ♥ I’m happy to provide blank templates of anything above too.
Honestly, the options are almost endless even with using completely free software and resources. There are so many things you can do and the best way to learn is to just keep creating and most importantly experimenting!! The more time you spend making designs the more you start to understand.
wanna get more advanced ???
If you don’t want to purchase Adobe products then I’d recommend checking out GIMP. It’s a totally free image editing software that has a lot of similar elements as Photoshop. Check out this article from tech radar too that lists the best free alternatives to photoshop.
I really hope this wasn’t a total disaster and actually managed to help??? If you have any questions I’ll do my best to try and answer them.
How do you design the graphics for your blog? I’d love to hear your thoughts and processes!
I hope you’re all having a fantastic day.
Find me: Twitter – Goodreads – society6 – RedBubble
Support Me: Kofi – Book Depistory affiliate link

This is awesome, love your post and the design of your blog is super pretty! I use Photoshop too but starting out on my blog I used Canva all the time 🙂
LikeLiked by 1 person
I strictly use Canva to design my images, I find it so easy to use. I keep my blog headers quite simple though, and I always put the name of my blog in the lower left corner.
LikeLiked by 1 person
I NEEDED THIS. i suck at graphics. thank you, you glorious, beautiful, amazing butterfly
LikeLike
i’m gonna cry 😭😭 but omg nooo i’m sure you’d be great!! thank you so much though, i’m so glad it’s helpful and if you make anything pls show me bc i wanna see!!! ♥♥
LikeLiked by 1 person
I’ll try!!!! You’re amazing
LikeLiked by 1 person
This was so useful!!! I use Canva but I feel like I don’t really understand it well, but this post was so good!
LikeLiked by 1 person
Thank you for writing such an amazing post!!! You’ve given me lots of great ideas and I can’t wait to spice up my Canva images. I especially love your March Wrap-Up pic — wow! 💕
LikeLiked by 1 person
As someone who’s awful at blog design, this was super helpful! I’m definitely going to be bookmarking this post and coming back when I have more time to fiddle around with graphics. Thank you so much for sharing your tips!
LikeLiked by 1 person
I use Canva all the time, but I’ve never realized how many options that I have with it, so I’ll definitely be using these tips for my blog design! I’m not the best at graphics so this is a lifesaver!!!!
LikeLiked by 1 person
this saved my life i didn’t even know canva existed. thanks!!
LikeLiked by 1 person
This is so helpful Lauren! I’ve been meaning to get around to changing my blog post images and recently downloaded Canva so this should help 🙂
LikeLiked by 1 person
This is such a helpful post! Thank you, I already bookmarked it!
LikeLiked by 1 person
Definitely bookmarking this. Thank you so much, Lauren!
LikeLiked by 1 person
hey, a huge thank you!! i haven’t open photoshop for a while, but thanks to you, i managed to do something that i like and i’m proud of?? wow, thank you!!!
LikeLiked by 1 person
omg sorry for such a late reply but ahhh that has made me so so happy! i’m so glad it was helpful and that you were able to create something with it. thank you so much ♥
LikeLiked by 1 person
Wow, this is an awesome resource!! Thank you so much! I only started using Canva recently and I’m so behind with graphic design so this is super useful to me! 🙂
LikeLike
Ahhh, thank you so much! I’m so glad it was useful! It can definitely be daunting when you first start, but it definitely gets easier ☺️
LikeLiked by 1 person